Python Environments with Conda
Module 4: IDEs & Tools
What is an environment?
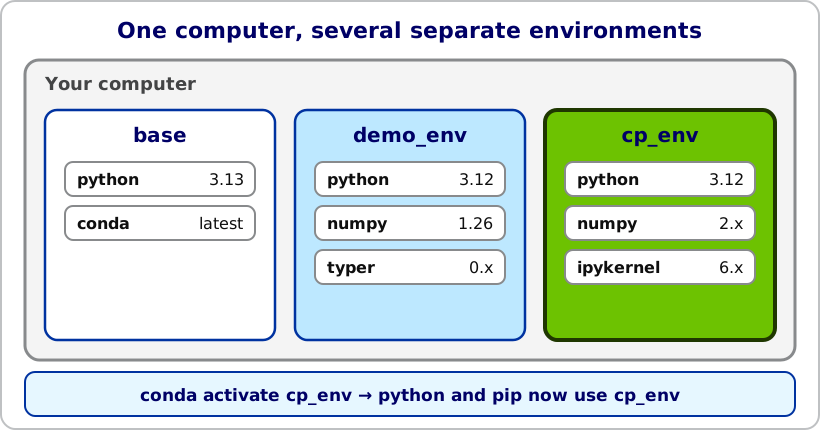
An environment is a separate space that keeps its own Python version and its own set of installed libraries.
Imagine two projects:
- Project A was written for NumPy 1.26.
- Project B needs NumPy 2.x.
If both shared one installation, installing one version would break the other project. With environments, each project has its own copy of the libraries and they never interfere.
Environments are useful because they:
- isolate the dependencies of each project, avoiding conflicts;
- make your project reproducible: someone else can create the same environment and get the same results;
- keep your computer clean: if an environment breaks, you delete it and create a new one.
Creating an environment
We use conda, which came with Anaconda.
- Open a terminal:
- Windows: open Anaconda Prompt from the Start menu.
- macOS and Linux: open your normal terminal.
- Create the environment with
conda create. The-nflag gives it a name. Let’s createdemo_envwith Python 3.12:
conda create -n demo_env python=3.12Conda lists the packages it will install and asks Proceed ([y]/n)?. Type y and press Enter.
The first time you run a command such as conda create or conda install, conda may ask you to accept Anaconda’s Terms of Service for its default channels (Do you accept the Terms of Service (ToS) for ...? [(a)ccept/(r)eject/(v)iew]). Read them, type a to accept, and the command continues. You can also run conda tos accept in advance. If you reject, conda cannot install from those channels.
Activating the environment
Before using an environment you must activate it. This makes python and pip point to that environment:
conda activate demo_envThe name (demo_env) appears at the start of your prompt. To go back to the default environment:
conda deactivateOther useful commands:
conda env list                    # list all your environments
conda list                        # list the libraries in the active environment
conda remove -n demo_env --all    # delete an environment
Installing libraries in the environment
With the environment active, install the libraries you need:
conda install numpyYou can check what is installed with conda list. Anaconda also offers the community channel conda-forge, with many more packages: conda install -c conda-forge package_name. If a library is not available in conda, use pip inside the active environment:
pip install typerA very common mistake is to install a library in one environment and then run your code in another. If you get ModuleNotFoundError for a library you know you installed, check the environment name in your prompt and the interpreter selected in VS Code.
Using the environment in VS Code
VS Code can also create environments for you: run Python: Create Environment from the Command Palette and choose venv or conda. In this course we create them from the terminal, to understand what is happening.
In a script
- Open a
.pyfile. - Look at the bottom-right corner of VS Code: it shows the Python interpreter. Click it.
- Choose the one that says
demo_env. If it does not appear, pressCtrl+Shift+P(Cmd+Shift+Pon macOS), run Python: Select Interpreter and pick it (you may need to choose Refresh).
In a notebook
- Open the
.ipynbfile. - Click Select Kernel at the top right and choose Python Environments, then
demo_env. - The notebook needs the
ipykernelpackage in that environment. Install it with the environment active:
conda install ipykernelNow the notebook uses the libraries of demo_env.
Practice
- Create an environment called
cp_envwith Python 3.12. - Activate it and install
numpyandipykernel. - Create a notebook in VS Code and select
cp_envas the kernel. - In the first cell run:
import numpy as np
print(np.__version__)- Open a terminal, run
conda deactivate, and then runconda env list. Which environment has an asterisk*?
conda create -n cp_env python=3.12
conda activate cp_env
conda install numpy ipykernel
After conda deactivate, the asterisk appears next to base: it is the environment active by default. While cp_env is active, the asterisk is next to cp_env.
Need Help?
If you have any questions, feel free to reach out via email at dprecioso@faculty.ie.edu